Pages

August 26, 2011

Claire's Mood Polish: Happy/Earthy

You've all probably heard by now of mood nail polish, but if there's anyone who doesn't, it's polish that changes color based on temperature. I bought 2 from Claire's, one called happy/earthy (the green/yellow one) and one called fabulous/funky (dark/light pink). Here's an example of the green one:


I absolutely love this polish! If your nails are long enough like mine, you can see the color change even at room temperature, without doing the hot or cold water thing. But here it is in hot water then in cold just to show you guys:


There's such a huge color difference in the change that it's really noticeable even from several feet away! Here's some more random pictures of this polish:


This next picture is without any hot or cold water, I was just really cold sitting in my room for a few hours and here's what my nails looked like.


I'll probably do a swatch of the pink one I bought at a later time, but for a heads up, either I got a faulty bottle or it really doesn't change color AT ALL.

August 19, 2011

Ladybug Nails

One of my sisters is the model for this cute design. Who doesn't want sparkly ladybugs on their fingernails? And the best part: it's really not that hard to do.


Here's the supplies I used:

- Viva Cosmetics Nail Hardener (my new base coat)
- Acrylic Paint (Black)
- Acrylic Paint (Bright Red)
- Sally Hansen Hard as Nails Xtreme Wear, White On
- Sally Hansen Hard as Nails Xtreme Wear, Invisible


The first step is to paint your nails all red. I used 2 coats of paint here.


Next, do a black french tip. You can always mix nail polish and acrylic paint, I just didn't have red or black nail polish when I did this manicure. Nail polish on top of acrylic or the other way around works just as well.


I know, the above picture is super messy but I clean it up later. And, her index finger is not shown because I did the next step on it without taking a picture first lol. So next, paint a straight line dividing your nail vertically.


Add three black spots to each ladybug.


And the eyes.


Now for some sparkles & a top coat/clear polish, and you're done!

August 12, 2011

Black & White Decal Pedicure

I just got these nail decals the other day (at the dollar store, actually) and I wanted to try them out! I already had a manicure on & didn't want to redo my nails just yet, so decided to try these out on my toes :)


Here's the supplies I used:

- Sally Hansen Hard as Nails Xtreme Wear, White On
- Sally Hansen Hard as Nails Xtreme Wear, Invisible
- Black & White nail decals (I got mine at Dollarama)


So first of all, paint all your toenails white. You'll probably want 2 or more coats as most white polishes aren't opaque with a single coat.


Next, put on the decals with a toothpick or tweezers. It's a lot easier than using your fingers and having the decal stuck to your fingertip instead of on your nail.


Now add the other stickers that you want. I did a spirally thing on my big toe next to the flower, and then a teeny tiny flower on each of my other nails.


And you're done! As always, remember a clear or top coat.


Close up of the decals/stickers:

August 5, 2011

Pink & Purple Angled French Tip

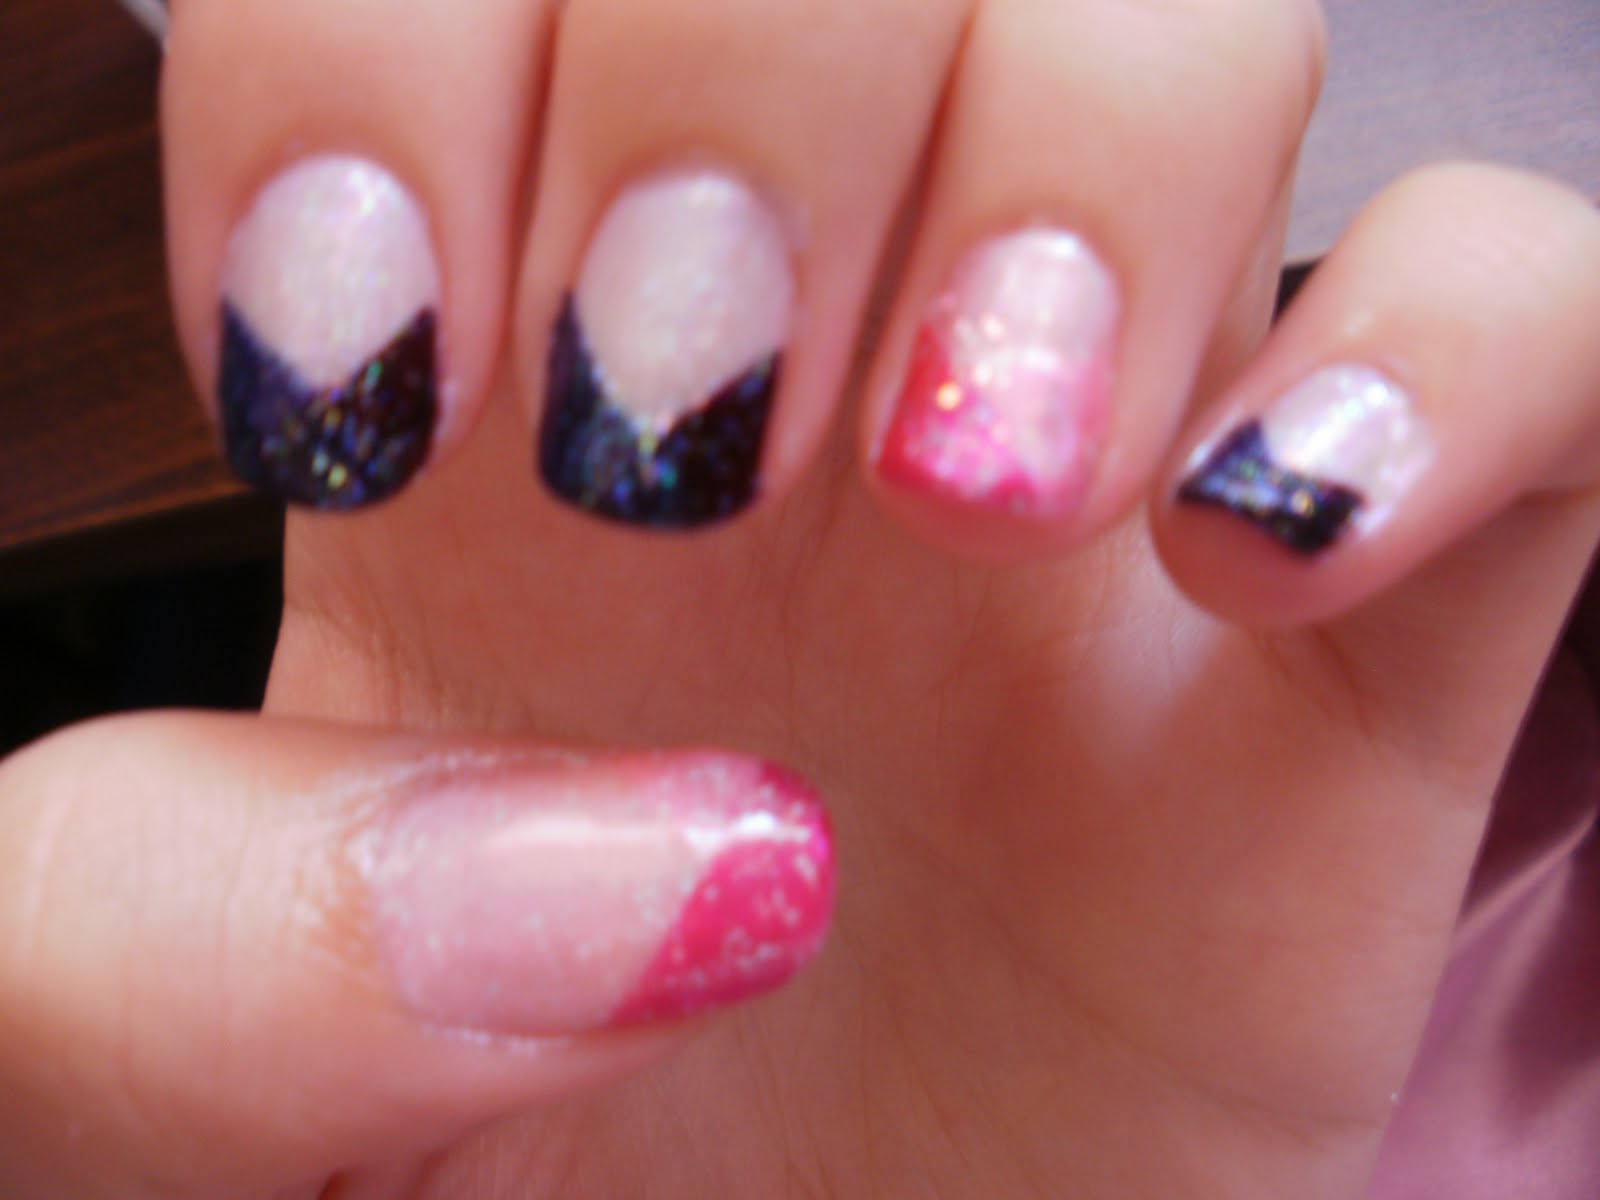
Hey guys, another French Tip for you today. This one take some practice at making the angles on the tips of your nails even but it's still quite a simple (and cute!) design.


Here's the supplies I used:

- Rimmel French Manicure, Soft Violet
- Cover Girl Continuous Color, Rouge Vamp
- Rimmel 60 seconds, Night Before
- Sweet Serenity light pink & dark pink (I don't know the names...)
- Sally Hansen Hard as Nails Xtreme Wear, Hot Magenta
- Sally Hansen Hard as Nails Xtreme Wear, Invisible


The first step is to paint your thumb and ring fingers with the sheer pink and your other fingers with the sheer purple.


Next, paint pink triangles on the tips of your thumb and ring finger nails with a darker pink than the sheer one you used as a base color.


Now, do the same with the darkest purple polish on your other nails.


Once those are completely dry, paint another triangle with the darkest pink on the other side of your nails from the first triangle.


Repeat for the second shade of purple.


And you're done! Just make sure to add a clear nail polish or top coat to protect the design. If you like the pink better than purple, try doing 3 pink nails and 2 purple instead, or two different colors entirely.

I just added some sparkle polish over top to make it a little more girly :)

August 2, 2011

Blue French Tip with Stickers + YouTube Channel Introduction

Hey guys, so it's not Friday, I know, but I just wanted to share this with you ASAP. So I have a YouTube channel now!! The username is the same as this blog: artistrynails

I did my first video on this manicure:


So please check it out if you're interested! Go to it here.